How to Clean a Derma Roller is a question that everyone who undergoes microneedling has to face. The effectiveness and safety of derma rolling depend significantly on proper maintenance. Regular cleaning is crucial to prevent bacteria introduction, avoiding infections or irritations. Proper upkeep not only ensures the device’s longevity but also maintains skin health, ensuring optimal results and enhanced product absorption with each use.
Then how to clean a derma roller? Let’s see in this article.
Why Cleaning Your Derma Roller is Crucial
The effectiveness and safety of derma rolling depend significantly on the cleanliness of the derma roller. Regular cleaning is crucial to prevent bacteria introduction, avoiding infections or irritations. Proper upkeep not only ensures the device’s longevity but also maintains skin health, ensuring optimal results and enhanced product absorption with each use.
Neglecting proper cleaning protocols can lead to several risks:
Infection Risk: The primary concern with using an unclean derma roller is the risk of infection. As the device creates micro-punctures in the skin, using a roller that has not been properly sterilized can introduce bacteria, viruses, or fungi directly into the bloodstream or deeper layers of the skin. This can result in conditions ranging from mild infections to more serious complications, necessitating medical attention.
Skin Irritation and Inflammation: An unclean derma roller can also cause skin irritation and inflammation. Residue from previous uses, including dead skin cells, product buildup, or bacteria, can lead to allergic reactions, rashes, or exacerbate existing skin conditions like acne or rosacea.
Compromised Skin Barrier: The skin acts as a barrier against environmental aggressors. Using a derma roller that is not properly cleaned can compromise this barrier function, making the skin more susceptible to damage from pollutants, UV radiation, and other irritants.
Reduced Effectiveness: Beyond health concerns, the effectiveness of derma rolling itself can be compromised by poor hygiene practices. A buildup of debris on the needles can blunt them, leading to uneven or insufficient microchannel creation, which can impede the treatment’s effectiveness and prevent skincare products from penetrating optimally.
To mitigate these risks, it is essential to follow a rigorous cleaning and disinfection routine before and after each use of your derma roller.
This includes thorough rinsing, using an appropriate disinfectant like 70% isopropyl alcohol, allowing the device to air dry completely, and storing it in a clean, dry place. By prioritizing cleanliness, you can ensure that your derma rolling routine remains a safe and effective component of your skincare regimen.
How to Clean a Derma Roller Step-by-Step
Proper cleaning of your derma roller is crucial for ensuring its effectiveness and your skin’s safety. Here’s a simple, step-by-step guide to help you maintain your derma roller in pristine condition:
Step 1: Check the Derma Roller
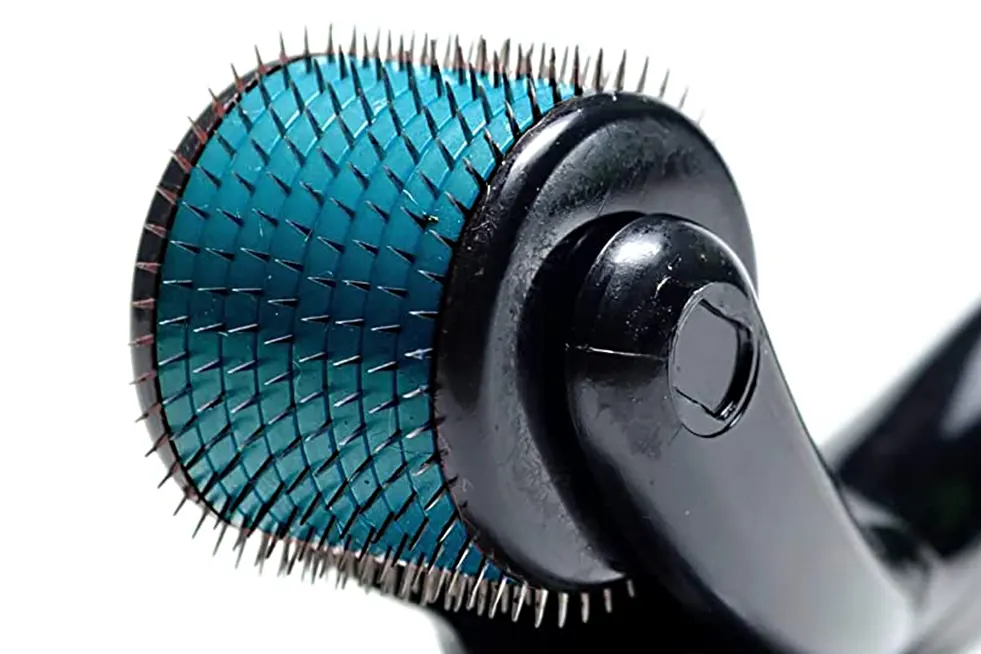
Before you start the cleaning process, closely inspect the derma roller for any signs of wear and tear. Look for bent, broken, or dull needles, as these can damage your skin. If you notice any damage, it’s time to replace your roller.
Step 2: Rinse Under Warm Running Water
Gently rinse your derma roller under warm running water to remove any surface debris, such as dead skin cells or serum residue. This step helps to ensure a more effective disinfection process.
Step 3: Disinfecting
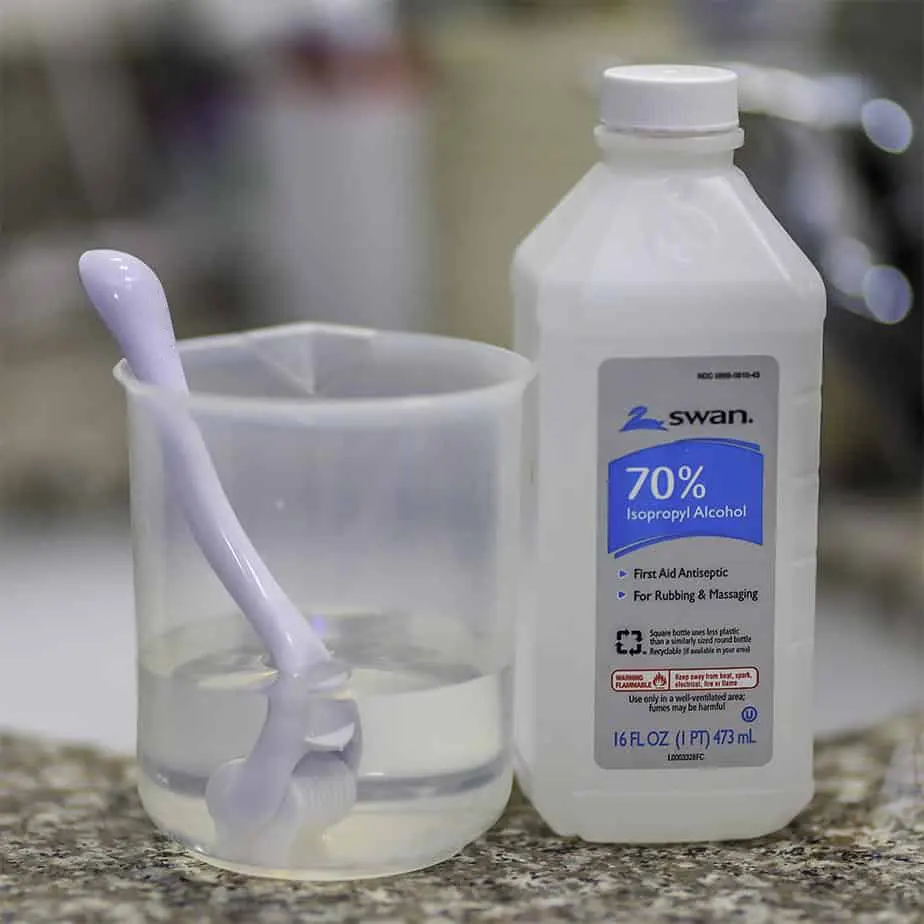
Soak in 70% Isopropyl Alcohol: Fill a small container with 70% isopropyl alcohol and submerge your derma roller completely. Let it soak for at least 20-30 minutes to ensure all bacteria and pathogens are killed.
Alternative Cleaning Methods: If you prefer not to use alcohol, denture tablets are a viable alternative. Dissolve a denture tablet in water and soak the derma roller as per the tablet’s instructions. This method can help to remove most bacteria but may not be as effective as isopropyl alcohol.
Step 4: Drying and Storing
Air Dry on a Clean Paper Towel: After disinfecting, remove the derma roller from the solution and let it air dry completely on a clean paper towel. Avoid using fabric towels to prevent lint from sticking to the needles.
Store in a Protective Case: Once dry, store your derma roller in its original case or another protective container. This keeps it safe from dust and contamination until its next use.
Following these steps ensures that your derma roller remains clean, safe, and ready for your next microneedling session. Regular maintenance not only prolongs the life of your derma roller but also protects your skin from potential infections and irritations, making your skincare routine more effective and hygienic.
When to Replace Your Derma Roller
How Often to Clean Derma Roller
Your derma roller should be cleaned thoroughly before and after each use to ensure it’s free from bacteria, debris, and other contaminants.
Before Use: Cleaning your derma roller before use is crucial, especially if it has been stored away since its last use. This pre-use clean ensures any dust or bacteria that may have settled on the device while stored is removed.
After Use: It’s imperative to clean the derma roller immediately after use to remove skin cells, serum residues, or blood that may have been deposited on the needles during the microneedling process.
Aside from these cleaning instances, engaging in a more thorough cleaning or sterilization process once a week or bi-weekly, depending on your usage frequency, is recommended. This might involve a longer soak in the disinfectant solution or using alternative cleaning methods.
Maintaining this cleaning schedule ensures your derma roller stays in optimal condition, providing the best possible results for your skin while minimizing any risk of adverse reactions.
Signs That It's Time to Replace Your Derma Roller
1)Dull or Bent Needles:
Unlike derma stamps and derma pens, since the derma roller uses a rolling method to operate on the skin, the needle tip of the derma roller will experience greater resistance and friction during the operation. This causes the derma roller’s needle tip to become dull and bent.
At this point, derma rollers are less effective at creating precise microchannels, and can lead to unnecessary damage or irritation to your skin. Inspecting the needles before each use can help identify when they are no longer in optimal condition.
2)Damaged or Broken Handle: If the handle of your derma roller is damaged or broken, it can affect your ability to use the device safely and effectively. A compromised handle may not allow for the necessary control and pressure during use, increasing the risk of injury.
3)Discoloration or Rust: Any signs of discoloration, rust, or other forms of wear and tear on the needles or the roller itself are clear indicators that it’s time for a replacement. Using a roller in such a condition can be harmful and may introduce rust or metal fragments into your skin.
4)Frequency of Use: Even with meticulous care, derma rollers have a limited lifespan. Most manufacturers recommend replacing your derma roller every 3-6 months, depending on how frequently it is used. Regular users might find the need to replace their device closer to the three-month mark, while occasional users could extend it to six months.
Common Cleaning Mistakes to Avoid
By understanding common cleaning mistakes, you can ensure your derma roller remains in optimal condition, ensuring the safety and effectiveness of your microneedling sessions. At the same time, you require the right approach to avoid damaging this delicate tool.
1)Not Following Manufacturer’s Instructions
One of the most critical mistakes is not adhering to the manufacturer’s specific cleaning and care instructions. Each derma roller may have unique requirements based on its materials and construction. Ignoring these guidelines can lead to damage or wear that reduces the roller’s effectiveness and lifespan. Always consult and follow the manual or instructions provided with your device to ensure you are caring for it correctly.
2)Using Harsh Cleaning Agents
While it’s crucial to disinfect your derma roller, using harsh cleaning agents like bleach or undiluted alcohol can cause more harm than good. These substances can corrode the metal needles or degrade the plastic components of the roller, compromising its integrity. Instead, opt for gentle, antibacterial solutions recommended for derma roller cleaning, such as 70% isopropyl alcohol, which effectively removes bacteria without damaging the device.
3) Over-aggressive Scrubbing
Derma rollers require gentle handling during the cleaning process. Over-aggressive scrubbing with hard-bristled brushes or sponges can bend or dull the needles, rendering the roller ineffective or even dangerous to use. Use a soft-bristled brush or toothbrush designated for this purpose, gently cleaning the needles to remove debris without causing damage.
4) Improper Drying and Storage
After cleaning, improper drying and storage can also lead to issues. Storing the derma roller while it’s still damp can encourage bacterial growth, while leaving it exposed can lead to dust accumulation. It’s important to let the derma roller air dry completely in a clean, ventilated area before storing it in its case or container. This prevents mold and bacteria from thriving and ensures the roller is clean and ready for its next use.
5) Neglecting Regular Maintenance
Regular maintenance is key to the longevity and effectiveness of your derma roller. Failing to clean it before and after each use, or overlooking the need for periodic deep cleaning, can lead to buildup of skin cells, product residue, and bacteria. This not only diminishes the roller’s performance but also increases the risk of skin irritation and infection.
By avoiding these common mistakes, you can maintain your derma roller in top condition, ensuring it continues to provide the benefits of microneedling safely and effectively.
How to Clean Derma Roller without Alcohol
While isopropyl alcohol is widely recognized as the most effective disinfectant for cleaning derma rollers, there are instances where you might need an alternative solution. However, it’s crucial to remember that isopropyl alcohol remains the preferred choice for its proven effectiveness in eliminating bacteria and other pathogens.
1)Soap and Warm Water
Using gentle soap and warm water is a straightforward method for cleaning your derma roller, especially for removing visible debris, oils, and serums from the needles. This method can serve as an initial cleaning step before disinfection. Apply a small amount of soap to the roller, gently brush it with a soft-bristled toothbrush, and rinse under warm water. While this approach helps remove surface residue, it lacks the disinfecting power of alcohol, making it a preliminary step rather than a complete solution.
2)Denture Tablets
Denture tablets present an innovative alternative for those unable to use isopropyl alcohol. These tablets are designed to clean and disinfect dental appliances, making them capable of removing bacteria from derma rollers. To use, dissolve a denture tablet in water as directed on the package, and soak the derma roller in the solution for the specified amount of time. This method can reduce the number of microbes on the device, but it may not achieve the same level of disinfection as alcohol.
While these alternatives can play a role in the cleaning process, they should not be solely relied upon for disinfecting derma rollers, especially if isopropyl alcohol is available. The primary goal in cleaning your derma roller is to ensure it is free from any pathogens that could cause infection or skin irritation. Isopropyl alcohol, with its quick evaporation rate and broad-spectrum antimicrobial properties, remains the gold standard for achieving this level of cleanliness. If you opt for an alternative method, consider it as part of a multi-step cleaning process, concluding with the use of alcohol to ensure your derma roller is safe for use.
Final Tips and Best Practices
1)Clean Before and After Use: Always clean your derma roller with an appropriate disinfectant, such as 70% isopropyl alcohol, before and after each use to remove bacteria and other pathogens.
2)Inspect the Needles Regularly: Check the needles for any signs of damage, such as bending or dulling, and replace the roller if any imperfections are found. Damaged needles can cause unnecessary harm to your skin.
3)Avoid Sharing Your Derma Roller: Sharing a derma roller can spread skin infections and conditions. Each device should be used by one person only to maintain hygiene.
4)Use Gentle Cleaning Methods: Avoid using harsh chemicals or aggressive scrubbing techniques that can damage the needles or the roller itself. A gentle brush and the correct cleaning solution are sufficient for effective cleaning.
5)Allow to Air Dry Completely: After cleaning, place the derma roller on a clean paper towel and allow it to air dry thoroughly before storing. This prevents bacterial growth and prepares the roller for its next use.
6)Store Properly: Once dry, store your derma roller in its original case or a clean, dry container. Proper storage protects the roller from dust and damage.
7)Replace Regularly: Even with meticulous care, derma rollers need to be replaced periodically. The frequency depends on how often you use it, but a general guideline is to replace the roller every 3-6 months for optimal performance and safety.
8)Follow Manufacturer’s Instructions: Each derma roller may have specific care instructions. Adhering to these guidelines ensures that you are maintaining the roller correctly and not voiding any warranties.
By following these best practices, you can maximize the benefits of your derma rolling sessions while minimizing the risk of skin irritation or infection. Remember, the care and maintenance of your derma roller are as important as the microneedling process itself in achieving healthy, glowing skin.
Wholesale and Customize Derma Rollers
If you are planning to incorporate derma roller into your sales and build your own brand, you must be wondering where to purchase a professional products. Fortunately, ROSEORCHID is just the company to meet your needs.
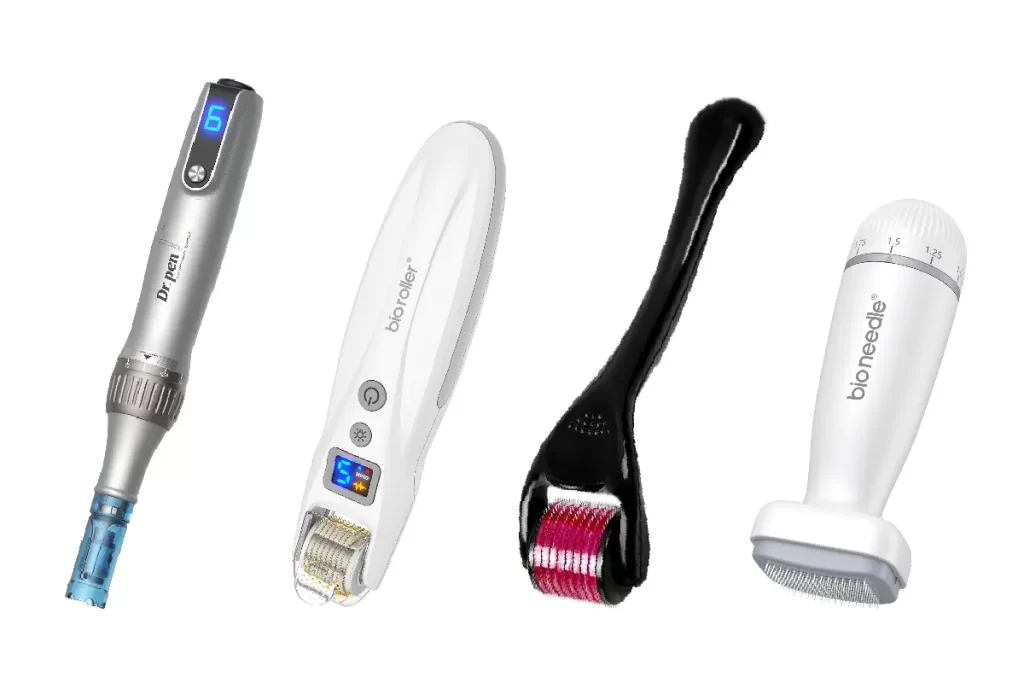
ROSEORCHID provides wholesale and customization of professional microneedle products for your business. You can purchase all types of microneedling products here, including: derma roller, derma stamp, derma pen, bio needle, hydra needle, derma stamp for hair.
You can choose different needle numbers, needle lengths, materials, uses, colors, logos, packaging and set combinations according to your business. You can also let us help develop products that are right for you.
Just tell us what you need. We have more than 10 years of experience in this area.
Conclusion
Maintaining a clean derma roller is crucial for safe and effective microneedling. Proper cleaning prevents infections, skin irritation, and ensures the best results. This guide emphasizes the importance of cleanliness in microneedling, providing detailed steps to keep your derma roller in top condition. By adhering to these practices, you’ll enhance your skincare routine’s impact and maintain your skin’s health and appearance.

